
What Is Image Compression? The Complete Beginner's Guide (2026)
Introduction
Have you ever tried uploading a photo to a website, sending it through email, or sharing it on social media, only to discover that the file size was too large? This is one of the most common problems people face when working with digital images.
Large image files take longer to upload, consume more storage space, slow down websites, and can negatively affect the overall user experience. Whether you’re a student submitting an assignment, a blogger publishing articles, an online seller uploading product photos, or a website owner trying to improve page speed, oversized images can quickly become a challenge.
This is where image compression becomes essential.
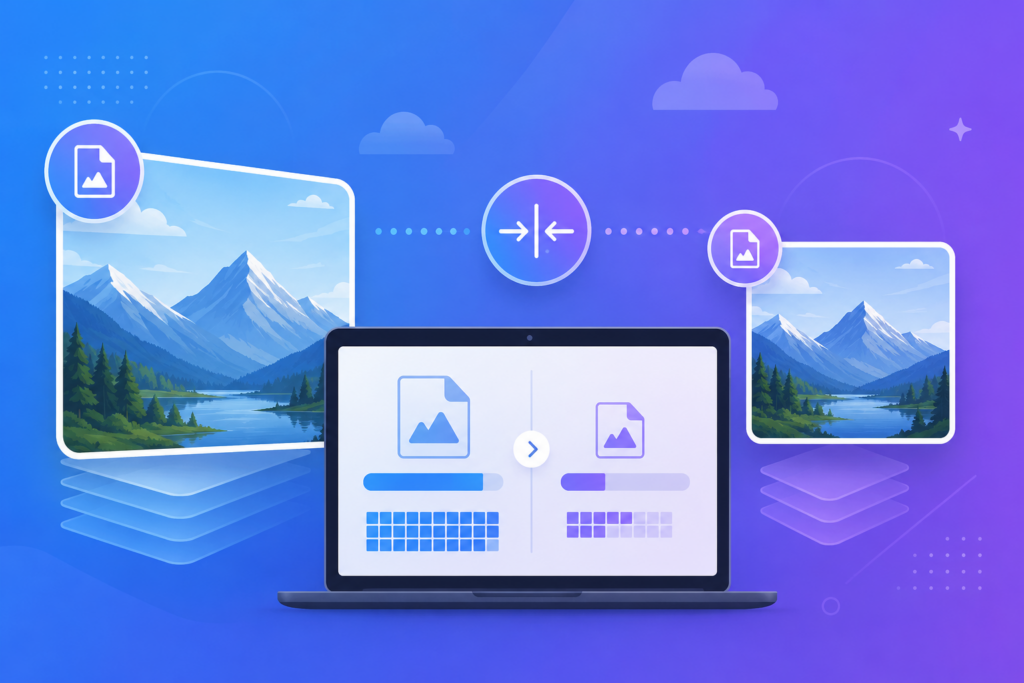
Image compression is the process of reducing an image’s file size while keeping its visual quality as high as possible. By compressing images, you can make them easier to upload, faster to download, and more efficient to store—all without significantly changing how they look.
I personally discovered the importance of image compression while working on documents for my own projects. I needed to convert several high-quality images into a single PDF, but the file became too large to share easily. After trying multiple online tools, I realized how important proper image optimization is, not just for sharing files but also for improving website performance. That experience inspired me to learn more about image compression and eventually build tools that make these everyday tasks easier for others.
In this guide, you’ll learn everything you need to know about image compression, including how it works, different compression methods, when to use them, and how to reduce image size without sacrificing quality.
Whether you’re a beginner or someone looking to optimize images professionally, this guide will help you understand the complete process in simple language.
Table of Contents
- What Is Image Compression?
- How Does Image Compression Work?
- Why Is Image Compression Important?
- Types of Image Compression
- Lossy vs Lossless Compression
- Popular Image Formats
- Benefits of Compressing Images
- Image Compression and SEO
- How to Compress Images Without Losing Quality
- Common Mistakes to Avoid
- Best Practices for Image Optimization
- Frequently Asked Questions
- Final Thoughts
What Is Image Compression?
Image compression is the process of reducing the size of an image file while preserving as much visual quality as possible. The primary goal is to make image files smaller so they load faster, use less storage space, and are easier to upload or share.
Instead of changing the appearance of an image dramatically, compression removes unnecessary or redundant data that most people cannot easily notice. As a result, the image becomes much lighter without significantly affecting its quality.
For example:
- An original image may be 8 MB.
- After compression, the same image might become 1.5 MB while still looking almost identical on a computer or smartphone screen.
This reduction in file size offers many practical advantages. Smaller images upload faster, download more quickly, improve website performance, reduce bandwidth usage, and make documents easier to share through email or messaging apps.
Image compression is widely used by:
- Website owners improving page speed
- Bloggers publishing articles with multiple images
- E-commerce stores uploading product photos
- Students submitting assignments online
- Graphic designers managing large image libraries
- Social media creators sharing visual content
- Businesses preparing presentations and reports
Without image compression, websites become slower, visitors wait longer for pages to load, and storage requirements increase over time.
How Does Image Compression Work?
Although image compression may sound technical, the basic idea is simple.
Every digital image is made up of millions of tiny pixels. Along with those pixels, an image file also stores color information, patterns, metadata, and other details. Many of these details are repetitive or unnecessary for everyday viewing.
Image compression works by identifying this redundant information and reducing or removing it efficiently.
Depending on the compression method, the software may:
- Remove duplicate image data.
- Simplify color information.
- Store repeating patterns more efficiently.
- Optimize the image structure.
- Remove unnecessary metadata such as camera information or GPS data (when applicable).
Because of these optimizations, the file becomes significantly smaller while maintaining a similar appearance.
For example, when you upload a JPG image to an image compression tool, the software analyzes the file, applies an optimized compression algorithm, and generates a new version with a smaller file size. In many cases, the difference is difficult to notice with the naked eye, especially when the compression level is moderate.
Modern image compression tools also allow users to balance image quality and file size. If you need maximum quality, you can choose lighter compression. If your priority is the smallest possible file size, stronger compression can be applied.
This flexibility makes image compression useful for everything from websites and blogs to online stores, social media, presentations, and document sharing.
Why Is Image Compression Important?
Today, internet users expect websites and applications to load quickly. Even a few extra seconds of loading time can frustrate visitors and reduce engagement.
Image compression helps solve this problem by making files smaller without significantly affecting their appearance.
Some of the biggest benefits include:
Faster Website Loading
Smaller images load more quickly, improving the browsing experience for visitors and helping websites perform better.
Better Search Engine Optimization (SEO)
Website speed is one of the factors that can influence search performance. Optimized images contribute to faster pages and a better user experience, which supports overall SEO efforts.
Reduced Storage Requirements
Compressed images occupy less storage space, allowing you to save thousands of images without consuming excessive disk space.
Easier File Sharing
Smaller image files are much easier to upload, email, or send through messaging applications.
Improved Mobile Performance
Many users browse websites using mobile devices and slower internet connections. Optimized images reduce data usage and improve loading speed.
Lower Bandwidth Usage
If your website receives many visitors, optimized images help reduce the amount of data transferred, which can lower hosting and CDN costs.
Types of Image Compression
Image compression can be divided into two primary categories:
- Lossy Image Compression
- Lossless Image Compression
Although both methods reduce image file size, they work differently and are designed for different purposes. Understanding the difference helps you choose the right compression method for websites, social media, printing, or professional design work.
What Is Lossy Image Compression?
Lossy image compression reduces file size by permanently removing some image data that is considered less noticeable to the human eye.
Once this information is removed, it cannot be recovered. However, modern compression algorithms are so advanced that, at moderate compression levels, most people cannot easily see the difference.
For example:
- Original Image Size: 8 MB
- After Lossy Compression: 1.2 MB
The image may look almost identical on a smartphone, laptop, or website while taking much less storage space.
Advantages of Lossy Compression
- Significantly smaller file sizes
- Faster website loading
- Lower bandwidth usage
- Better user experience
- Ideal for blogs, websites, and social media
Disadvantages
- Some image quality is permanently lost.
- Repeated editing and saving may reduce quality further.
- Not recommended for high-quality printing or professional editing.
Best Use Cases
Lossy compression is commonly used for:
- Website images
- Blog featured images
- E-commerce product photos
- Social media posts
- Email attachments
- Online portfolios
For most websites, lossy compression provides the best balance between quality and performance.
What Is Lossless Image Compression?
Lossless image compression reduces file size without removing any image information.
Instead of deleting pixels or color data, it reorganizes the information more efficiently so the image can be perfectly reconstructed whenever it is opened.
Think of it like compressing a ZIP file. The file becomes smaller, but nothing inside is lost.
Example:
- Original Image Size: 8 MB
- After Lossless Compression: 6.8 MB
The reduction is smaller than lossy compression, but the image quality remains exactly the same.
Advantages of Lossless Compression
- No quality loss
- Perfect image restoration
- Ideal for editing
- Suitable for printing
- Better for logos and graphics
Disadvantages
- Larger file sizes compared to lossy compression
- Slower websites if large images are used
- Higher storage requirements
Best Use Cases
Lossless compression is ideal for:
- Company logos
- Transparent graphics
- UI elements
- Technical illustrations
- Medical images
- Professional photography archives
- Images that will be edited multiple times
Lossy vs Lossless Compression
Choosing between lossy and lossless compression depends on how you plan to use the image.
| Feature | Lossy Compression | Lossless Compression |
|---|---|---|
| File Size | Much Smaller | Slightly Smaller |
| Image Quality | Slight Quality Loss | Original Quality Preserved |
| Website Speed | Excellent | Good |
| Storage Space | Low | Higher |
| Best For | Websites, Blogs, Social Media | Logos, Design Files, Printing |
| Editable Without Quality Loss | No | Yes |
Which One Should You Choose?
If your goal is to improve website speed, reduce storage, and provide a better user experience, lossy compression is usually the best choice.
If you need maximum quality for editing or printing, lossless compression is the better option.
Popular Image Formats Explained
Different image formats support different compression methods. Choosing the right format is just as important as compressing the image itself.
JPEG (JPG)
JPEG is one of the most widely used image formats on the internet.
It uses lossy compression, allowing images to become much smaller while maintaining good visual quality.
Best For
- Blog images
- Product photos
- Travel photography
- Website banners
- Social media images
Advantages
- Small file size
- Fast loading
- Excellent browser support
Limitations
- No transparency support
- Quality decreases after repeated editing
PNG
PNG uses lossless compression, making it perfect when image quality must remain unchanged.
Best For
- Logos
- Icons
- Screenshots
- Graphics with transparency
- UI elements
Advantages
- Crystal-clear quality
- Supports transparent backgrounds
- Excellent for graphics
Limitations
- Larger file size than JPG
WebP
WebP is a modern image format developed to provide both excellent quality and smaller file sizes.
It supports both lossy and lossless compression.
Best For
- Modern websites
- WordPress websites
- E-commerce
- Blogs
- Landing pages
Advantages
- Smaller than JPG
- Smaller than PNG
- Excellent quality
- Supports transparency
Because of its efficiency, WebP is widely recommended for improving website performance and reducing page load times.
AVIF
AVIF is one of the newest image formats and offers even better compression than WebP in many cases.
Advantages
- Extremely small file sizes
- Outstanding image quality
- Excellent compression efficiency
Limitations
- Older browsers and software may not support every AVIF feature.
- Some editing applications still have limited compatibility.
AVIF is becoming increasingly popular as modern browsers and content management systems expand support for it.
Which Image Format Is Best?
There isn’t a single “best” format for every situation. The right choice depends on how the image will be used.
Choose JPG if:
- You are uploading photographs.
- You need smaller file sizes.
- Website speed is important.
Choose PNG if:
- You need transparent backgrounds.
- The image contains text or logos.
- Quality is your highest priority.
Choose WebP if:
- You want faster-loading websites.
- You need a balance between quality and file size.
- You’re optimizing images for modern browsers.
Choose AVIF if:
- Maximum compression efficiency is important.
- Your website supports modern image formats.
- You want the smallest possible file size while maintaining high quality.
How Image Compression Helps SEO
Image optimization is more than just reducing file size—it directly supports a better user experience, which is an important part of modern SEO.
Optimized images can help by:
- Improving page loading speed
- Reducing bandwidth usage
- Supporting better mobile performance
- Helping visitors stay engaged
- Improving Core Web Vitals such as Largest Contentful Paint (LCP) when large images are optimized appropriately
- Making websites more efficient on slower internet connections
While image compression alone doesn’t guarantee higher rankings, it contributes to overall site performance and user satisfaction, which are important aspects of technical SEO.
How to Compress Images Without Losing Quality
Reducing an image’s file size doesn’t always mean sacrificing its quality. With the right techniques and tools, you can significantly decrease file size while keeping the image sharp, clear, and visually appealing.
Whether you’re optimizing images for a website, blog, online store, presentation, or social media, following the correct process ensures the best balance between quality and performance.
Step 1: Choose the Right Image Format
The first step in image optimization is selecting the correct file format.
Different image formats serve different purposes:
- JPG – Best for photographs and blog images.
- PNG – Ideal for logos, screenshots, and transparent images.
- WebP – Excellent choice for websites because it provides smaller file sizes with high quality.
- AVIF – Modern format offering outstanding compression and quality for supported browsers.
Choosing the right format before compression can reduce file size even before any optimization takes place.
Step 2: Resize Large Images
Many people upload images directly from their smartphone or camera.
These images often have resolutions such as:
- 4000 × 3000 pixels
- 6000 × 4000 pixels
However, if your website only displays images at 1200 pixels wide, uploading the full-size version wastes bandwidth and slows down your pages.
Resize the image to match the maximum display size before compressing it.
Example
Original Image:
6000 × 4000
8.2 MB
Optimized Version:
1200 × 800
350 KB
The image still looks excellent while loading much faster.
Step 3: Compress the Image
Once the image is resized, use an image compression tool to reduce unnecessary data.
A good image compressor:
- Reduces file size
- Maintains visual quality
- Removes unnecessary metadata
- Optimizes color information
- Creates a web-friendly image
The goal isn’t to create the smallest file possible.
The goal is to create the smallest file that still looks professional.
Step 4: Preview Before Downloading
Always compare the compressed image with the original.
Check:
- Image sharpness
- Text readability
- Color accuracy
- Fine details
- Edges
If you notice visible quality loss, reduce the compression level slightly.
Most users cannot distinguish a well-compressed image from the original.
Step 5: Upload the Optimized Image
After compression:
- Upload the optimized version to your website.
- Replace old oversized images.
- Keep filenames descriptive.
Example:
❌
IMG_849384.jpg✅
image-compression-guide.jpgDescriptive filenames help both users and search engines understand the image.
Best Practices for Image Compression
Following best practices ensures your images remain lightweight without compromising quality.
Compress Before Uploading
Never upload large original images directly to your website.
Always optimize them first.
Use Modern Formats
Whenever possible, choose WebP or AVIF instead of older formats because they usually provide better compression.
Keep the Original Copy
Always save the original image.
If you ever need a higher-quality version, you won’t have to recreate it.
Don’t Compress the Same Image Repeatedly
Every time a lossy image is compressed again, quality may decrease further.
Instead, compress the original file whenever possible.
Remove Unnecessary Metadata
Many images contain extra information such as:
- Camera model
- GPS location
- Date taken
- Device settings
Removing unnecessary metadata can reduce file size without affecting appearance.
Optimize Images for Their Purpose
Different images require different compression levels.
Examples:
- Blog images → Moderate compression
- Product images → High quality with balanced compression
- Social media → Small file size
- Logos → Lossless compression
Common Image Compression Mistakes
Many beginners accidentally reduce image quality more than necessary.
Here are some of the most common mistakes.
Compressing Too Much
Trying to create the smallest possible file often results in:
- Blurry images
- Pixelation
- Poor user experience
Always balance quality and file size.
Uploading Huge Camera Images
Modern smartphones capture extremely high-resolution photos.
These images are excellent for printing but unnecessary for websites.
Resize them before uploading.
Using PNG for Every Image
PNG is excellent for graphics and logos.
However, using PNG for large photographs often increases file size dramatically.
For photographs, JPG or WebP is usually a better choice.
Ignoring Mobile Users
More than half of internet traffic comes from mobile devices.
Large images consume more mobile data and increase loading times.
Always optimize for mobile users.
Forgetting Alt Text
Compression improves performance, but accessibility is equally important.
Every image should include descriptive alt text.
Example:
❌
image1.jpgAlt Text:
Image✅
Filename:
compressed-jpg-example.webpAlt Text:
Compressed JPG image showing optimized website performanceProfessional Tips Used by Website Owners
Experienced website owners follow several optimization techniques beyond basic compression.
Use Lazy Loading
Lazy loading delays image loading until visitors scroll near them.
Benefits:
- Faster initial page load
- Better user experience
- Reduced bandwidth usage
Compress Featured Images
Featured images are usually the largest images on a page.
Optimizing them provides the biggest performance improvement.
Use Responsive Images
Different devices require different image sizes.
Serving smaller images to mobile users improves loading speed.
Test Page Speed
After optimizing images, check your website using performance testing tools.
Monitor:
- Page loading speed
- Largest Contentful Paint (LCP)
- Overall performance score
Regular testing helps identify images that still need optimization.
Image Optimization Checklist
Before publishing any image online, ask yourself:
- ✔ Is the image resized correctly?
- ✔ Is the file compressed?
- ✔ Is the correct format selected?
- ✔ Does the image still look sharp?
- ✔ Does it have a descriptive filename?
- ✔ Does it include meaningful alt text?
- ✔ Is the file size as small as possible without noticeable quality loss?
- ✔ Will it load quickly on mobile devices?
If your answer is “Yes” to all these questions, your image is well optimized.
Real-World Example
Imagine you’re publishing a blog post with five product images.
Before Optimization
- Total Image Size: 18 MB
- Page Load Time: Slow
- Mobile Experience: Poor
After Optimization
- Total Image Size: 2.5 MB
- Faster Loading
- Better Mobile Performance
- Improved User Experience
The images still look professional, but the page is much lighter and easier for visitors to access.
Conclusion
Image compression is one of the simplest yet most effective ways to improve digital performance.
Whether you’re managing a blog, running an online store, creating content, or simply sharing photos with friends, reducing image file size helps save storage, improve loading speed, and deliver a better user experience.
Choosing the right image format, applying the appropriate compression method, and following optimization best practices can make a noticeable difference in both website performance and everyday file management.
Instead of uploading large, unoptimized images, take a few moments to compress them first. It’s a small step that can have a significant impact on speed, efficiency, and usability.
As web technologies continue to evolve, modern formats like WebP and AVIF, combined with smart compression techniques, will play an increasingly important role in delivering fast, high-quality web experiences.
🚀 Try Our Free Image Compressor Tool
Ready to reduce your image size without compromising quality?
Use our Free Image Compressor Tool to:
- Compress JPG, PNG, WebP, and other popular formats.
- Reduce image size in seconds.
- Maintain excellent image quality.
- Improve website performance.
- Save storage space.
- Share files more easily.
👉 Try our Image Compressor Tool now and optimize your images in just a few clicks!
(Link this CTA to your Image Compressor Tool page.)
Related Articles
To strengthen your SEO and keep users engaged, link this article to related content on your website, such as:
- How to Compress Images Without Losing Quality
- JPG vs PNG vs WebP: Which Format Is Best?
- Best Image Sizes for Websites
- Image SEO Guide for Beginners
- PDF vs JPG: What’s the Difference?
- How to Convert Images to PDF
- Best Free PDF Tools
- Complete Guide to Website Speed Optimization
External References
When relevant, reference trusted resources such as:
- Google Search Central (Image SEO)
- Google PageSpeed Insights
- Web.dev (Image Optimization)
- MDN Web Docs (Image Formats)
Use these only as supporting references and avoid excessive external links.